

How To Paint Metallic Texture
How to create realistic metallic textures
This tutorial is designed to help you understand how real car paint works, as well as how to create your own in 3ds Max. Although this tutorial is for 3ds Max and V-Ray, the theories we cover should be transferable to other packages as well.
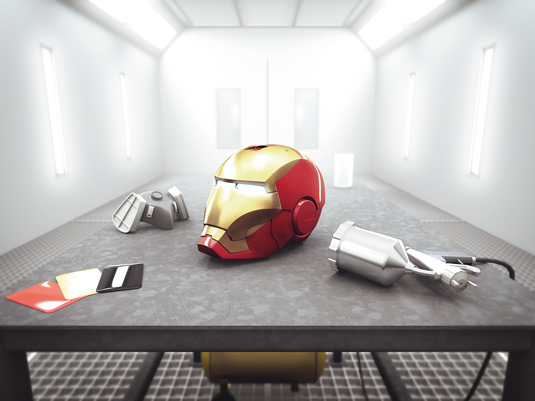
A good car-paint material will add a lot of depth to your image instead of just looking like a coloured reflective surface. By the end of this tutorial, you should be able to create your very own.
01. Understanding real car paint
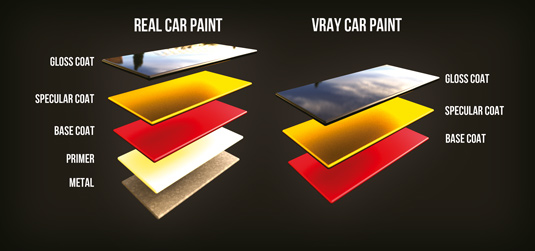
Cars are sprayed in layers: the painter lays down multiple layers of paint to create a deep-looking finish. Usually this includes paint layers, a specular or flake layer and then several gloss coats. It is much the same with a car paint created in V-Ray. This image (above) shows roughly how real car paint compares to the V-Ray car paint.
What it outlines is that both versions are made up of many layers. Car paint in real life will inevitably have more layers than are illustrated here. The depth comes from stacking these layers one upon another,
or paint sprayed layer upon layer.
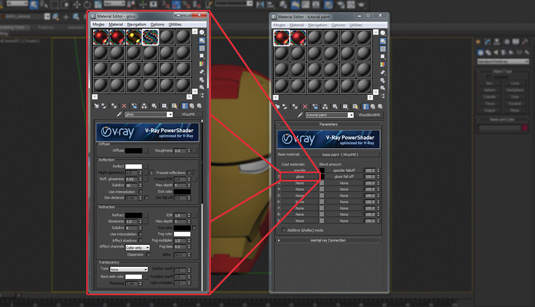
02. Using V-Ray
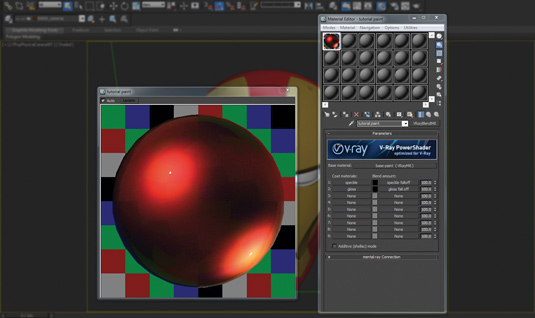
To create the same effect we will need to use a VRayBlendMtl, which we will come to later. This image illustrates how the different layers of paint are laid out. As you can see, it works from the base layer up through the different layers finishing with the gloss coat.
The beauty of these V-Ray materials is that we can control precisely how each layer interacts with the one below. This means that we can tailor it to look exactly how we want, which is precisely what we are going to do in this tutorial.
03. Creating the base coat
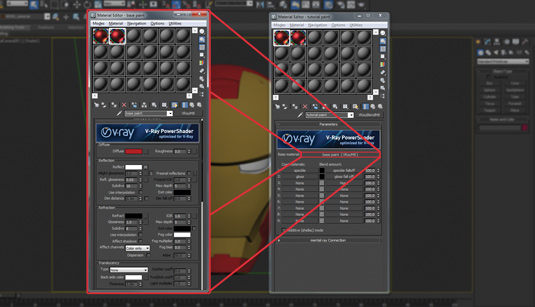
Next I will take you through the steps to creating a realistic car paint, explaining in turn why each step is important. It makes sense to start with the base coat - this, when used in the VRayBlendMtl, is conveniently called Base Material. This is where the colour information is held for the main body of the material.
04. Experiment with reflections
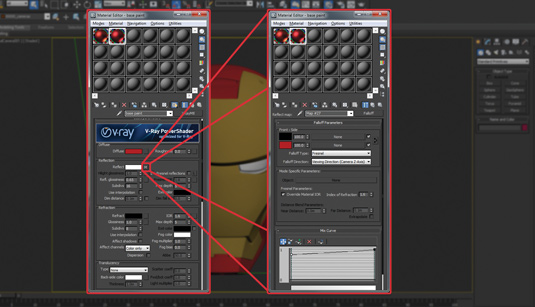
These settings (shown above) are a good starting point. By altering the Reflection Glossiness you can create sharper or blurrier reflections, which is particularly important if you are creating a specific car paint.
05. Mix curve settings
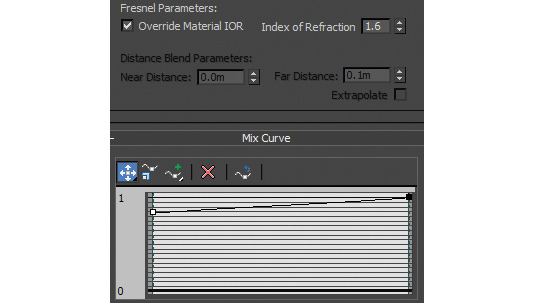
By raising the left-hand side of the mix curve, you tell the material
to start reflecting sooner. This means that as you look head on to the material, it will reflect more of its environment. Typically, flat paints are less reflective when viewed head on, deep paints are more reflective.
06. The specular coat
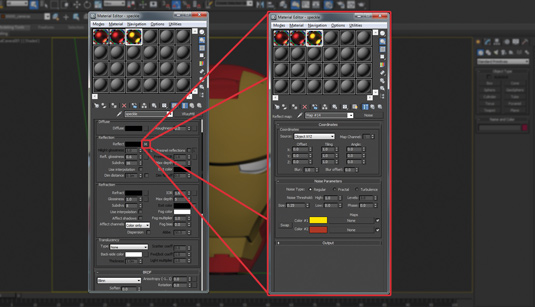
The specular coat is where the metallic effect comes from. By changing the Reflection Glossiness, you can adjust the spread the specular has. I use a noise map in the reflection map slot, so the highlights from this layer will be yellow or orange. Look closely at your reference to see what colour your specular highlights will be.
07. Use the noise map in the bump slot
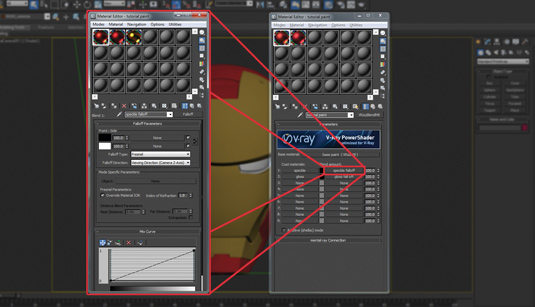
At this stage we don't need to worry about Fresnel fall-off, that will come later. The noise map is the driving factor. To make these 'speckles' stand out, we use the same noise map in the bump slot (converting it to black and white first). This will allow the speckles to be picked up by the light. Use a low number for the bump value.
08. The gloss coat
You don't need any colour in the diffuse slot, so set it to R,G,B 0,0,0. Make the reflection value white 255,255,255 as the gloss needs to be very reflective. We will control the reflections with a fall-off later. The Reflection Glossiness value is up to you, I typically stay with high values of gloss of 1.0. It's quite a simple material. Experiment with the values to see what you like.
09. Dealing with different lighting conditions
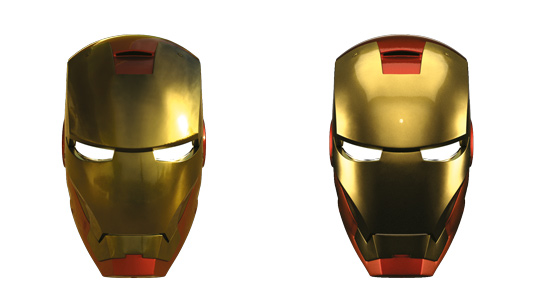
Once you have created your material, it is a good idea to test it under different lighting conditions. The image here shows two different lighting conditions. The image on the left is rendered using a bright sunny day HDRI. The image on the right is rendered using a combination of indirect and direct studio lighting. The settings shown throughout this tutorial will replicate similar results to the ones you see.
Words: Dave Cox
Dave Cox is a London-based automotive artist working at Burrows CGI Studio in Essex. This article originally appeared in 3D World issue 177.
Related articles
How To Paint Metallic Texture
Source: https://www.creativebloq.com/3d/how-create-realistic-metallic-textures-51411511
Posted by: blakemanmulend.blogspot.com
0 Response to "How To Paint Metallic Texture"
Post a Comment